The Top Mitsubishi Galant VR-4 Resource

Join the best E39A 1991-1992 Mitsubishi Galant VR-4 community and document your GVR4 journey. Login to browse without most ads.

daily driver + semi trailer = ruined friday and new paint

FlyingEagle

Staff member
Joined
Mar 5, 2005
Messages
1,635
Location
THE Ottawa
Is this the factory color the car has been resprayed with?

I have a bumper that came over from France, so GTi trimming: Bumpers from France.

Was curious if this would be the same color as yours, and if you have access to the color code the painters used to mix it all up.

I may have to match my rear bumper now. Your car is lookin' tits by the way.
 

misterfixit

Well-known member
Joined
Aug 4, 2004
Messages
1,596
Location
Midlands, UK
Right its been a week now, so time for an update:

Got loads going with the body, there was a stress dent in the "b" pillar that I spent tuesday dressing out and finishing through the loom access hole. I dropped in the dash with the door cards in (after I made up a new pair to fit with speaker grilles as the old drivers one was trashed by the accident, and while I was building the left door the wind took the doorcard down the garden and ripped it. Once the dash was in it was clear I should have given the dash and the doorcards to the jig man as "a" pillar was about 5mm out of position.

I felt sh*t when I discovered this. So while I was chewing this over I also noticed a little half inch cut that had gone through the front section of the inner "c" pillar that needed welding before going any further.

I cracked on getting in what I could. I managed to borrow a body ram and spent wednesday squeezing and teasing the "a" pillar back to the right place. Well chuffed as it now fits the top of the wing and has pulled all the gaps down the side of the car home.

Last night despite the crappy weather My freind came round and we managed to weld the little slit up... so top tip for all of you, if its thin and blowing holes clamp some copper to the back and you can build it up to weld the gap shut.

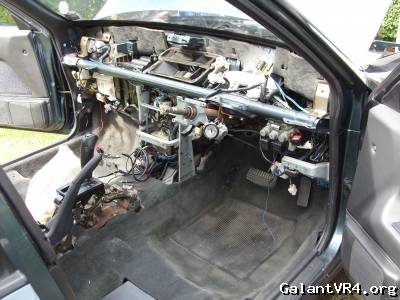
Here's where it was after an hour today, ready for the dash to go back in:
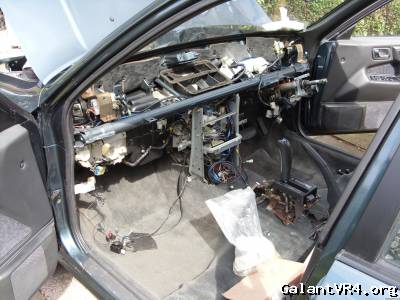


Everything that pokes through the firewall is back on, but theres still loads to do here:
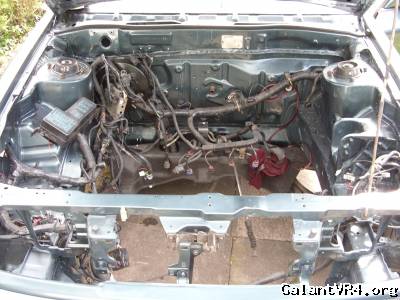
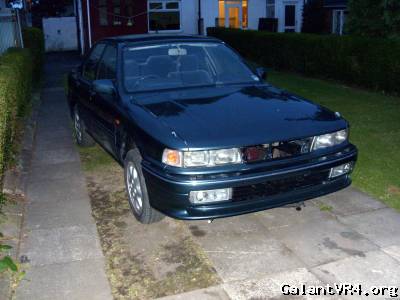
And a gratuitous view of the outside to show the car coming together:
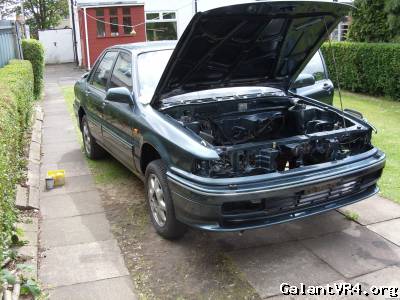

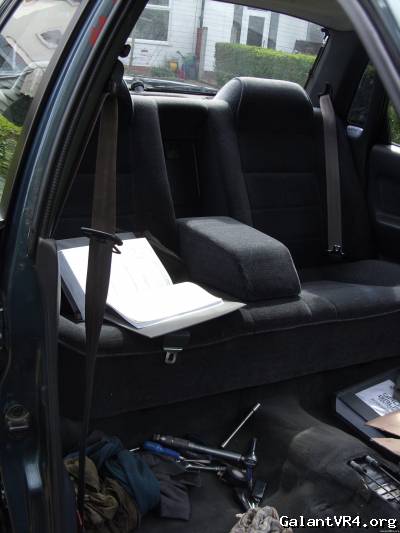
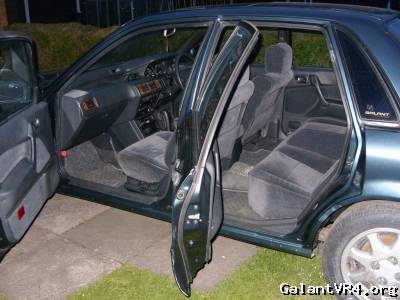
End of the day and the inside is finished completely.

Trunk:
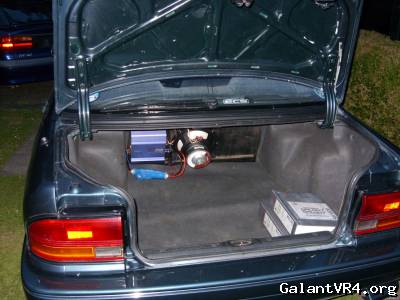
Inside:
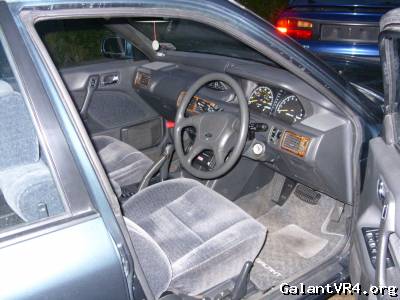

Then, just because I could and i was fed up of looking at a blind car, I did a little up front and gave her her eyes back:)


My colour code is G31, hannover green (belize green in the us). Had a quick look through the colt body manual and G31 is not listed.

Later these weeks I'll post the colt colour tables.

So happy to have a mile stone passed /ubbthreads/images/graemlins/smile.gif and space appearing inside the garage, it is simply amazing how much space a car takes up in pieces.
Rich
 
Last edited:

misterfixit

Well-known member
Joined
Aug 4, 2004
Messages
1,596
Location
Midlands, UK
Engine bay fit out today. Weather was doing it's best to drown me this morning so I spent the morning cleaning the brake lines and clips and getting ready for it to stop...

All the hard lines (fuel and brakes)are back on, thats not a comfortable job or particularly safe feeling hence the tyres under the sills and the jackstands.

Looms tied off, wiper mech, cruise, ecs, washer bottle (cleaned the slime out /ubbthreads/images/graemlins/wink.gif) a/c lines, reciever drier, master cylinder, etc... back in and fixed properly.


Leaping ?


Going through parts quickly now.

Rich
 
Last edited:

FlyingEagle

Staff member
Joined
Mar 5, 2005
Messages
1,635
Location
THE Ottawa
Quote:
My colour code is G31, hannover green (belize green in the us). Had a quick look through the colt body manual and G31 is not listed.

Later these weeks I'll post the colt colour tables.


My bumper came from France, so it might not have been listed in the British guide, or maybe even the Japanese guide as sometimes each market gets colors another doesn't.
Thank you for the help, I hadn't realized that it may have been Belize Green, but have yet to see that color in person.
 

misterfixit

Well-known member
Joined
Aug 4, 2004
Messages
1,596
Location
Midlands, UK
Sunday was a bit of a washout as far as visible progress goes.. got loads of little bits finished up, but most of the day was spent standing in the garage looking through the rain. /ubbthreads/images/graemlins/frown.gif

So today came home determined to make some progress. Here are some pics with timestamps:
16.57

(no its not an AMG motor, just the placcy trim on the top /ubbthreads/images/graemlins/wink.gif)
17.01 (engine and trans on a crawler... so easy to move around)

17.01 checking its position

17.01 with the car high enough up it rolls right under /ubbthreads/images/graemlins/wink.gif

17.07 back down on jackstands (tyres and wood are a safety net)

17.07 oodles of clearance and can get the crane onto it

17.14 In place, get the bolts in quick

17.33 its in... /ubbthreads/images/graemlins/wink.gif /ubbthreads/images/graemlins/grin.gif

More time to spend tomorrow..

Rich
 

GSX_TC

Well-known member
Joined
Apr 7, 2011
Messages
3,732
Location
Houston, Texas
I was talking about all 3 of them. corners, headlights and fogs. There just so beautiful.

If they are so many sets over there in the philippines why don't u send me a set? Can u find me a set of the facelift corners and headlights like Rich's in the pics above?
 
Last edited:

pmp285

Well-known member
Joined
Feb 23, 2010
Messages
76
Location
manila,philippines
easy... those came out stock here in the philippines in the form of galant gti... 4g63 na fwd... hard part is sending it to the u.s... dont know how much it will cost... i can make arrange thru may workmates in philippine airlines though...
 

RedTwo

Well-known member
Joined
Jul 16, 2008
Messages
1,917
Location
New Zealand
Quoting pmp285:
if only theres an easy way to ship HLs and corners to the u.s....


trebuchet.jpg

Trebuchet?
 

misterfixit

Well-known member
Joined
Aug 4, 2004
Messages
1,596
Location
Midlands, UK
Been quiet here a few days now, no I've not been slacking, its just i've finished on it about 10.30 and its taken to midnight to get clean...

Here's Wednesdays progress.. You have it so easy in the us regarding shite on the bottom of cars.. here i had 20 years of uk road shite, grime underseal etc.. to remove, all the bolts to tease out, threads to chase and huge lumps to paint.. needless to say I felt quite proud after 2 long evenings graft.

The longest process was dissecting the two subframes I had and checking them together. it was the front right that took the big thump fron the wagon and the steering was not the same since.
The rack is an eps rack i'd fitted to the grey (donor) car while it was my dd, but it had a good clean up on the ends (to make tracking a pleasure) and brand new pipes off the thumped one. I thought about it a it and just couldn't be arsed with loads of fumbling down behind the motor, so I built this lump up and jacked it in. I highly recommend that you drop this if you need to work on it.. so so easy lowering the rack in from chest height.#

I was really happy the wishbone on the thumped side was ok as this has the height sensor bracket, ball joint was shagged though so I stuck in a new one, all the joints are now lovely.
Got alot tied off in the engine bay too. Heres the bay on wednesday:


Here is where its at after tonights stint:


Yes its got stuff to connect the wheels to /ubbthreads/images/graemlins/smile.gif

underneath is all done too, well up to the back seat anyhow. What?, no exhaust?! I'll leave that off until its all been waxoyled, makes it easier to just spray everything and notend up with horrid burning smells

Looking well isn't it? Still loads to do, but the front just needs filling and bleeding of all the fluid systems. I'll hop to the back tomorrow and get the tank and filler dressed and in. Still waiting some bits from Mitsubishi to finishthe car off, but they won't hinder progress.

Rich
 

misterfixit

Well-known member
Joined
Aug 4, 2004
Messages
1,596
Location
Midlands, UK
Hi All, three days of hard slog down, Three lists gone through...

Got all the rear end done. Tank on, axle redone disks cleaned up (shitty dirty horrid job /ubbthreads/images/graemlins/frown.gif...

been mega busy since these , you'll see from the next pic its back on the deck:

Is running now, cooling trans, steering, filled and bled exhaust on, brakes bled/serviced/e-brake set. all fastners torqued and copper greased. A gallon of waxoyl has gone on the underside (before the exhaust went on) A compressor and a gun is required for this.. once i finished this I threw my clothes away and had a shower and scrubbed myself with a scourer (its not nice sh*t to have all over you).

Here's a front three quarter view. Was playing with the camera trying out using an axle stand as a tripod and the self timer...

Needs an application of the rubber mallet to the right headlight support bracket to bring the grill back into line /ubbthreads/images/graemlins/wink.gif


Again playing with the camera... clean wheels, and autoglym xgp

Couldn't get a slot for inspection today so it'll be inspected Friday. if it passes it'll be back as a daily driver that afternoon yay...

Rich
 
Last edited:

AnotherNewb

Well-known member
Joined
Apr 25, 2010
Messages
1,472
Location
Orlando, FL
Pretty inspiring work. I cant believe this is the same car. On another note... Your use of idiums confuses me at times. /ubbthreads/images/graemlins/confused.gif What is waxoyl? You crazy europeans and your strange words... /ubbthreads/images/graemlins/rofl.gif
 
Support Vendors who Support the GVR-4 Community
Boosted Fabrication ECM Tuning ExtremePSI Fuel Injector Clinic Jacks Transmissions JNZ Tuning Kiggly Racing Morrison Fabrications RixRacing RockAuto RTM Racing STM Tuned

Recent Forum Posts

Recent Classifieds Listings

Top