The Top Mitsubishi Galant VR-4 Resource

Join the best E39A 1991-1992 Mitsubishi Galant VR-4 community and document your GVR4 journey. Login to browse without most ads.

daily driver + semi trailer = ruined friday and new paint

misterfixit

Well-known member
Joined
Aug 4, 2004
Messages
1,596
Location
Midlands, UK
Popped in today, no progess though a Van took precedence... Hehe still maybe more tomorrow.

The length of time it took before I started was to make sure I got a sensible wedge from the insurance purely to allow this level of work to take place.

Rich
 

misterfixit

Well-known member
Joined
Aug 4, 2004
Messages
1,596
Location
Midlands, UK
Big progress today and yesterday, can you spot both items from this picture?


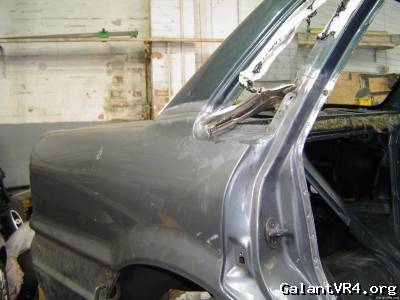
Well obviously the quarter is gone! But they have been doing alot of work at the front on the 'a' pillar. it now fits the door lovely. they welded a few brackets on and spent most of yesterday pulling it around to square up the door aparture and get it sitting right. It looks ace now,

Now the real visible work strts as they get ready to slit the quarter and splice it in with the light panel. Enjoy the pictures /ubbthreads/images/graemlins/wink.gif


Haha heres a pile of bent shite appearing nicely!


More to come tomorrow (I hope)

Rich
 
Last edited:

misterfixit

Well-known member
Joined
Aug 4, 2004
Messages
1,596
Location
Midlands, UK
Well, not quite tomorrow, but the bodyshop guy has thrown his back out, the Guy left has had a good stint at it today

So heres the updates, Friday afternoons progress preparing the Quarter panel off the silver car ready to fit:

From the backside, peeled off the inner arch and all zinc weld primed:

So that was where it was on Friday afternoon.
Lefthand rear door has had a crease in it since the day the car was bought and as this level of repair is being done and I had a spare door I dropped this off after work on monday. It was then I found out the body guy had thrown his back out. Didn't check the shop yesterday (other things to do and figured no point)

But today after work this is the sight that greeted me:

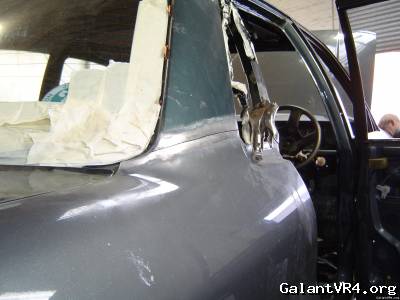
Clamped and screwed in place (screws you ask). They self tap the panels once clamped along the seam so you can position everything round the closures hence the clamps around the rear lower seam. Another trick is the panels are overlapped by an inch or two for this operation (on the c pillar and the bottom of the arch) so that when time comes they can slit the panels in clamped situ using a 1mm cutting disk so you get a perfect panel end form /ubbthreads/images/graemlins/smile.gif /ubbthreads/images/graemlins/wink.gif

(thats a golden trick that one).
So here from the back you can see everything square, you can also see the straight door (see earlier pics for tweaked one!):


Heres a gratuitous view into the trunk just to show it coming together;


Ps: Are ones that are Kensington grey on the right and belize green on the left doubly fast?

Rich
 

desant78

Well-known member
Joined
Jun 23, 2010
Messages
732
Location
Clarksboro, NJ
Yessss great job! instead of just letting yet another vr4 die....way to help this dying breed survive! /ubbthreads/images/graemlins/applause.gif
 

cheekychimp

Well-known member
Joined
Apr 19, 2004
Messages
7,333
Location
East Sussex, U.K.
It's not a VR4 but a rather rare car nonetheless especially in it's current form. It has some extremely trick bits on it. I wish this sort of jig had been available to me when the black car got shunted. That car has since been repaired and I have driven it and it felt great but you could still see it wasn't quite straight anymore. The rear passenger door on the left hand side just doesn't sit straight.
 

DR1665

Well-known member
Joined
Oct 19, 2005
Messages
4,643
Location
Iowa City, IA
I know, right, Paul? I got two what could use some time on such a rack. One's had the front hacked off with a Sawzall and another tacked into place. The other's been ass-rammed hard enough to buckle the d-pillar, and I had to clearance the rear quarter panel with a hammer to keep the back door from interfering with the front.

And this cat's getting his sh*t sorted proper. /ubbthreads/images/graemlins/applause.gif
 

iceman69510

Turn Right Racing
Staff member
Joined
Mar 5, 2001
Messages
10,992
Location
Michigan
This is what is left of my friends 911 after a racing shunt at about 140+ at Road America


Before:


After:


The entire right side was destroyed. Here's the other car after:
 

misterfixit

Well-known member
Joined
Aug 4, 2004
Messages
1,596
Location
Midlands, UK
Progress slow today. and no pics. we'll do that tomorrow in the daylight.

As Paul says this is the ex dd its an 1800 fwd, but that doesn't stop it being part of the family. The chopped up one was a 2wd so yes I have a spare carpet, but its for a rhd 2wd.

It's not just the jig its the people who know how to use it and the pulling gear. As those who have trolled here for a long time will have seen I had 2 Sunny RZ-1 before the Galants. My white sunny I spent a good amount of time pulling and pushing the roof about, but I didn't get it straight.

Paul if you can find a shop with a jig then they are generally the kind of people who are into cars. My theory is if you can clear the way for them you can get a very good job. Obviously the scale of this build is a little different from your black car, but it really isn't much work to gut the back of the car to make room for some body people to have a good look at it. This place is a Renault specialist whose bread and butter is more modern kit. but they are good people with a good setup. Its worked wonders stripping the car as they can see I'm not taking the piss and they are going the extra mile for it, you can see that in the pics.

Rich
 

misterfixit

Well-known member
Joined
Aug 4, 2004
Messages
1,596
Location
Midlands, UK
Here's todays update.

We'll start with a picture of the rot that sideswiped us yesterday /ubbthreads/images/graemlins/frown.gif
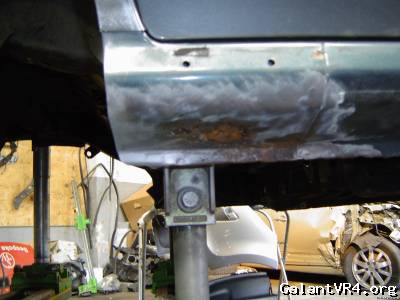
there are about 4 panels that come together here, so Its going to be a bit of surgery to make sure the cancer is gone and the panel structure is correct, but we've chopped up a few other cuts (the pile of galant bits they've got from me is very harlequin spec) and weve come up with a solution for there, but that cutting 'll be next week.

Brian moved the car out to the middle of the shop to take full advantage of the lovely spring sunshine and the roller shutter was up (i think he was fed up of crawling around it bent over) So the front cross member was next in line for treatment!
Here's Brian merrily cleaning up the welds after spot cutting them:
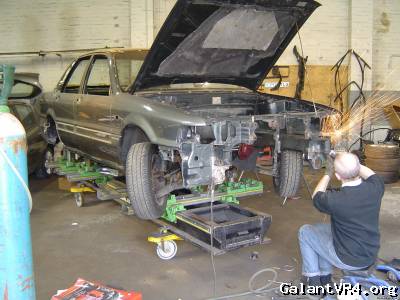
You can see here how much of an ace job has been made of the "a" pillar.
Here he is again:
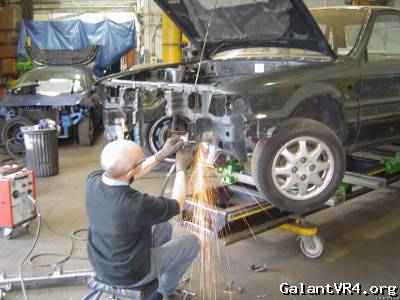
The offending rotten shite removed in disgrace:
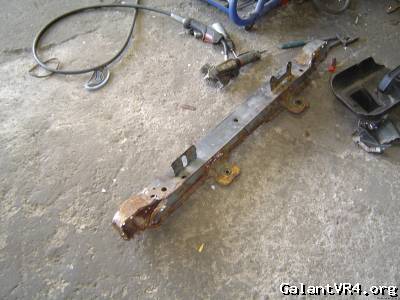
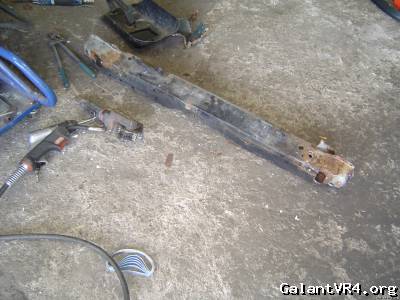

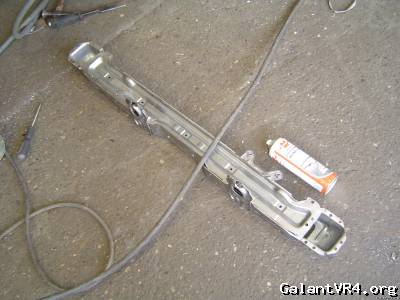
The replacement, zinced and ready to go:


Now earlier I was talking about overlapiing and cutting the panels together. Here is the result on the top of the rear quarter:

And for those europhiles this was outside, its the owners latest project. in the next two days its in a container and off to HK so paul, best watch out for it on patrol!
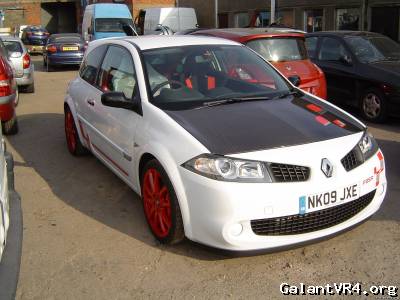
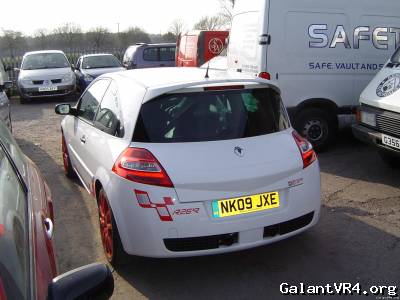
Don't know much about it other than its carbon everywhere and has a meaty cage from the factory! He got it cheap after it went backwards into a field and has turned it right again.

Anyhoo.. Hopefully once they've finished setting the panels on monday ther'll be some welding going on. Still a couple of patches to get into and clearup but some good going today /ubbthreads/images/graemlins/smile.gif

Rich
 

misterfixit

Well-known member
Joined
Aug 4, 2004
Messages
1,596
Location
Midlands, UK
Well It'll be ready for the paint guys to redo the underbody in a few days.
Still a few little areas to be fixing at, but here's an update from today!

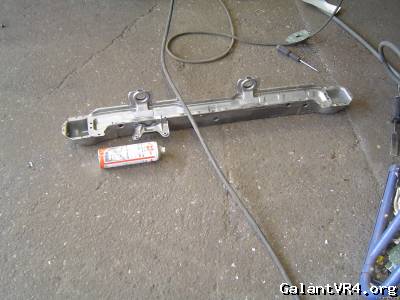
Front crossmember back on:

Here's one of the side gussets. Theres about a gazillion spot welds that once drilled out were plug welded once the new panel was in place:

Quarter panel is now welded on too:

here's the bottom of the quarter. This was a pain.. As 4 panels come together in one place here. Still, it looks well doesn't it?:

Ended up cutting off the bottom of the quarter panel, the inner arch extension, the back 4" of the outer sill where it drops behind the quarter, and a good portion of the side sill extension (the gusset bit that erupts out of the top)
It was all built up again from scratch and layerd in and plug welded where it needed to be. Here you can see where the new panel has been rolled into the inner arch (like new /ubbthreads/images/graemlins/smile.gif );

Heres the base of the rear and the bottom of the light filler panel;

Left side was starting to go so we've taken the oppertunity to open it up and do that too! Here's where it's at. Needs a good dose of a planishing hammer now its tacked in then it can be finished up;


Thats the news for today folks /ubbthreads/images/graemlins/wink.gif

Rich
 

misterfixit

Well-known member
Joined
Aug 4, 2004
Messages
1,596
Location
Midlands, UK
Been a few days now since the last update:

She's back on her wheels sans jig:


Paint Guy has been to look at it (body guys brother) and its too much for him. he has decided he doesn't want to get caught up in it for a long time so as he was not keen I had to then go find another paint shop.

Found the crew from my old bodyhop and another shop to boot. The last shop will be collecting the car this week and they'll start on it before long. Once It's down there I'll get some pics of some of the cars that are there. There's an XK8 in the booth at the moment, and an old MB 600 coupe, and a Lotus sunbeam.

So once again some /ubbthreads/images/graemlins/frown.gif and some /ubbthreads/images/graemlins/smile.gif but its moving on.

Rich
 

cheekychimp

Well-known member
Joined
Apr 19, 2004
Messages
7,333
Location
East Sussex, U.K.
Quoting misterfixit:


And for those europhiles this was outside, its the owners latest project. in the next two days its in a container and off to HK so paul, best watch out for it on patrol!


Don't know much about it other than its carbon everywhere and has a meaty cage from the factory! He got it cheap after it went backwards into a field and has turned it right again.


Did this come out by air Rich? You aren't going to believe this but on the 6th April I was in Shatin traveling along Shatin Rural Committee Road and I either saw THIS car or it's evil identical twin sporting a trade plate in the opposite lane. My wife had the frigging camera around her neck because we had just been to the 25 years of Pixar exhibition at the Heritage Museum but it was still too quick to snap a pic!
 

misterfixit

Well-known member
Joined
Aug 4, 2004
Messages
1,596
Location
Midlands, UK
Hi,

Back from the Philippines and on the way home checked in at the paint shop, fully expecting to find little progress /ubbthreads/images/graemlins/wink.gif.. The lad had borrowed his sisters camera and snapped pictures of it down to bare metal in the engine bay. I'll collect these when I can get my laptop down there.

Here is the engine bay in primer /ubbthreads/images/graemlins/smile.gif


Inside of the hood.


Still going!!!

Rich
 

misterfixit

Well-known member
Joined
Aug 4, 2004
Messages
1,596
Location
Midlands, UK
A bit of an update for those that have noticed it's been a while.

We've been over in the Philipines looking for a house for two weeks. Managed to get the car to the bodyshop before going away. Came back and found he'd been through the engine bay and cleaned all the crust and brought it back fresh (theres a buch of pictures of that, which I'll collect off his camera tomorrow).

Here's where it was on tuesday:

It's difficult to see here (cell phone pic) but the guy has spent hours on his back and cleaned up the arch and the inside of the innering filler panel. He's then moved onto the side of the car to clean and flat the door shuts.

That was tuesday... I havn't been back yet as I collected these to remove the chrome trim and associated gluey gloopy sh*t behind them. They are now clean and ready to head back to the bodyshop with:


Now this was a nice surprise as I thought I'd be tied up in the trim for weeks, so it was very nice to have a bit of spare time to head to the Dealer today to collect these nice shiny new bumper brackets:

the old ones had dissolved /ubbthreads/images/graemlins/blush.gif

Then I started on the epic task of going through bolts (it's really nice to be thinking about putting it back together again /ubbthreads/images/graemlins/wink.gif)
Here's tonights fruit to get the tinwork back together again;


So there's the little bit of update on the G-ride

The weekend was taken up with this:

(rewiring)

(dash together)

The Egg van back in one piece....


Cheers All /ubbthreads/images/graemlins/wink.gif
Rich
 

MMCVR4

Well-known member
Joined
Feb 16, 2005
Messages
740
Location
SoCal
That build/repair looks like fun. Awesome job! Please send that Renault Megane my way.
 
Support Vendors who Support the GVR-4 Community
Boosted Fabrication ECM Tuning ExtremePSI Fuel Injector Clinic Jacks Transmissions JNZ Tuning Kiggly Racing Morrison Fabrications RixRacing RockAuto RTM Racing STM Tuned

Recent Forum Posts

Recent Classifieds Listings

Top