The Top Mitsubishi Galant VR-4 Resource

Join the best E39A 1991-1992 Mitsubishi Galant VR-4 community and document your GVR4 journey. Login to browse without most ads.

Does this win the "Worst first post ever!" award?

kumfasa

Well-known member
Joined
Feb 28, 2015
Messages
125
Location
Tauranga, New Zealand
Hi Tektic,
Yep, if you drop the downpipe off the turbo you get all sorts of access from below but it doesnt move the AC hoses which were the main obstacle.
 

kumfasa

Well-known member
Joined
Feb 28, 2015
Messages
125
Location
Tauranga, New Zealand
Hi all,
Ben, I was thinking about doing a build thread with plenty of car pics and then the t/belt went.. I'll get around to it don't worry.

Here is an update on the head removal.

Ten Bolts away...


Its out!


It all went without a hitch although I read the head removal/mini rebuild thread on DSMTuners and the part about "Then I just layed a fender cover over where the radiator was - leaned over the front & picked the sumbitch up." ...Well... lets just say that fella is made of sturdier stuff than me. With intake and exhaust manifolds on that lump is heavy!!! I got the missus on one side and we lifted it out rested it on the front of the engine bay and then transferred it to the workbench.


The pistons tell a story. All four look the same. All intake valves touched down and this is clear by the fact none of them close fully in the head. It looks like 1 or 2 of the exhaust valves scraped off a bit of the carbon on the piston crowns but they all seal visually. No light visible from either side when closed.


The valve train is out of the head but I don't have a valve spring compressor so will need to borrow or buy one to get them out.


Ill post again once I get the valves out and inspect the head and valve guides.

PS one exhaust stud snapped off in the head with no threads showing. What are my best options for removal?
 

kumfasa

Well-known member
Joined
Feb 28, 2015
Messages
125
Location
Tauranga, New Zealand
A quick update and question.

I have the valves out.

Upon inspecting the head, everything is good (within spec) except for 2 intake valve guides that have a small 3-4mm long hairline crack in the combustion end of the guide (Where the guide wall tapers slightly). There was no detectable slop or side to side movement in the valves when in the guides that would indicate high wear or dramatic deformation of the guides. The valves also moved freely in the guides.

The cracks were likely formed when the already bent valves were forced up into the guide by the piston.

This sounds like a noob question but "Do these guides really need to be replaced?

I know some people grind the ends of the guides down flush to the port wall to increse air flow through the port (on the intake side) so I wonder about the impact of these small cracks.
 

kumfasa

Well-known member
Joined
Feb 28, 2015
Messages
125
Location
Tauranga, New Zealand
I thought I would post an update on how my rebuild/recovery is progressing for those that are interested.

NEW PARTS!!!
My JNZ order arrived today, yes!


While waiting I decided to port and polish my head turning this...


Into This....


Hopefully I can start the head assembly this weekend and look to get the longblock back together in the next few weeks.
Following that I have the timing belt and accessories to replace and then I can drive her again. I really want it back on the road for summer.


I'm thinking about replacing all the timing components and water pump while the head is off as there will be more room to operate, then just add the timing belt once the head goes back on. Can anyone see any issues with this?
 

OldHairyBastard

Well-known member
Joined
Apr 27, 2005
Messages
4,510
Location
Northern Chicagoland Area
Replace it all while it's apart. I would check and replace the crank pulley too if the rubber has started to crack even just a little. Also if the front main seal is leaking just replace that and the oil pan gasket as well if it's leaking. Check all of your hoses and vacuum lines and replace them if cracking or if they are not pliable anymore. Might as well do it all while shes apart and easy to work on.
 

kumfasa

Well-known member
Joined
Feb 28, 2015
Messages
125
Location
Tauranga, New Zealand
Thanks for the info. I have a new crank pulley, the old one was cracked and starting to separate. Have checked all the vacuum lines and hoses, they all seem firm and pliable so will leave them be.
I only had one oil leak and it was at the Cam angle sensor o-ring which I am replacing.
 

BENE38A

Well-known member
Joined
Sep 2, 2013
Messages
261
Location
New Zealand
let me know if you need anything have odds and ends left over, a new oem idler pully and random oem seals left over from my recently completed build
 

kumfasa

Well-known member
Joined
Feb 28, 2015
Messages
125
Location
Tauranga, New Zealand
Thanks Mate,
I did a fair bit of research before ordering the parts so I think I have everything. Ill keep you posted on how I get on.
All the timing components are off and the gasket surfaces prep'd.
I have a little cleaning to do as one of the cam seals and the cam angle sensor seal were leaking (I got replacements) and then assembly can start. Ill post up pics as I go.
 

kumfasa

Well-known member
Joined
Feb 28, 2015
Messages
125
Location
Tauranga, New Zealand
Yeehaa!!! Its time for an update.

After Porting and polishing the heads, I lapped the valves. I found a "Holts" valve lapping kit that has the lapping handle and two different grit pastes, Course and Fine. It left very nice looking seats. I then gave the head a final and thorough cleaning before installing the valve train.
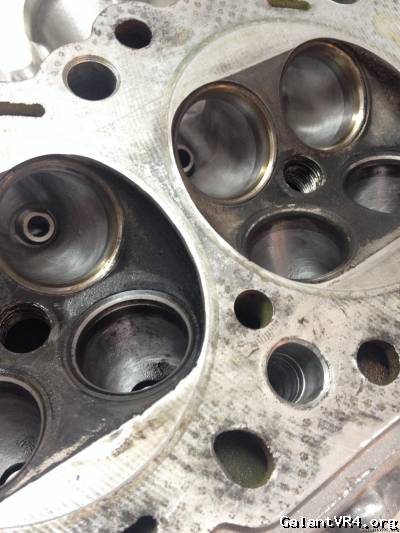
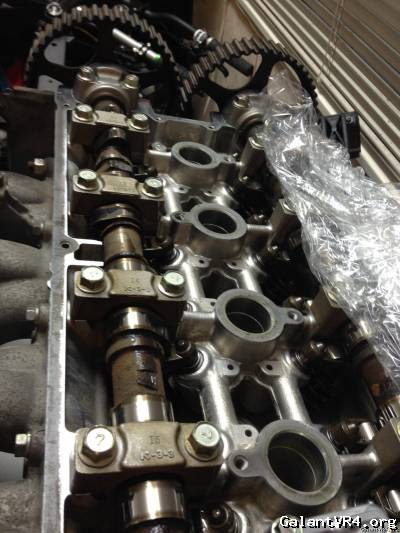


I did not replace the valve guides, I hope I dont regret it.

I took the opportunity to upgrade to ARP head studs. And BC1100 valve springs.
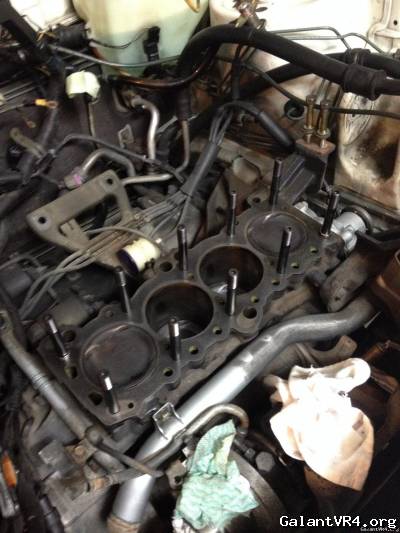


One thing I found with the ARP studs was that the washers needed to be installed prior to dropping the head onto the studs/block. With the studs protruding through the head the valves springs prevent you putting the washers onto 4 of the studs! (2 corner and 2 center studs)

After lifting the head, fitting the washers and dropping it again I thought it would be plain sailing. Not so.

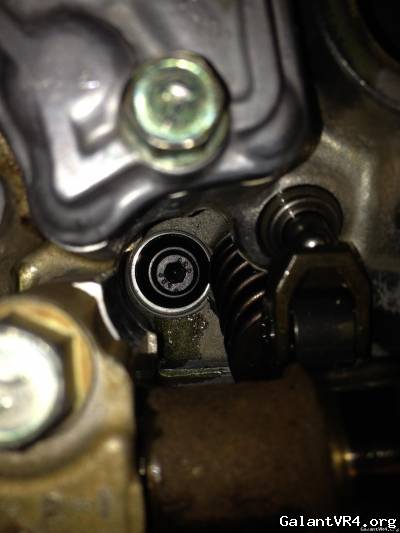
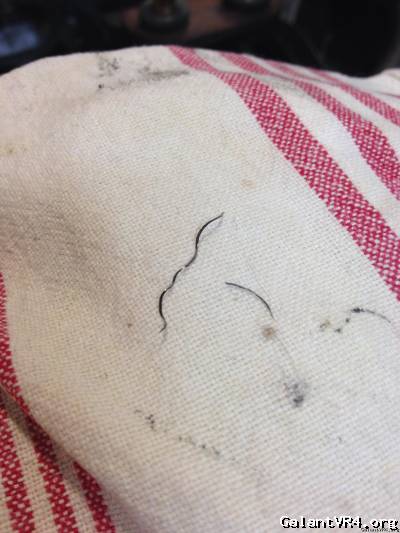
The nuts for the ARP's have a larger outer diameter that the factory bolts and they get hung up on the valves and the hardened valve seat washers. When tightening the nuts down the valves would flex out of the way but the seat washers actually cut the outer edge of the nuts and removed metal from them. You can see it in the photos. I spent quit a bit of time with a pick and a magnet removing the shards of steel from around the studs.


Any way I got it done and then started fitting "THE REST" of the engine back together. I installed the head with the intake manifold attached but left the exhaust manifold off. I replaced the turbo stud with a bolt so thought adding it after would be easy enough. Accessing the lower manifold studs to put the nuts on and tighten them down was a bitch, no access for the tourque wrench but I could gauge the correct torque with my arm on some of the upper nuts first. Good enough.
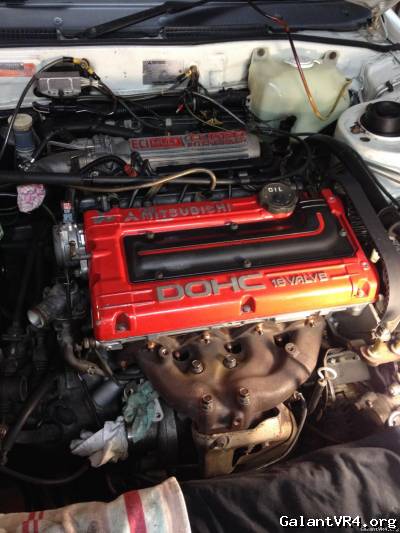


Thats all the pics I have for now, I actually got it all back together, filled it with fluids, fired the car up and took it for a 40minute drive today.

It runs great, idles better than it ever did and no leaks or funny noises. Pulls cleanly to redline and hits 10psi of boost at 2500 rpm in 3rd gear. I couldn't be happier!

This was a big job for me as an mechanical amateur, getting it together and running first pop with no issues is an absolute win in my books. Once I give it a wash ill post some pics of the car in its new found glory.
 
Support Vendors who Support the GVR-4 Community
Boosted Fabrication ECM Tuning ExtremePSI Fuel Injector Clinic Jacks Transmissions JNZ Tuning Kiggly Racing Morrison Fabrications RixRacing RockAuto RTM Racing STM Tuned

Recent Forum Posts

Recent Classifieds Listings

Top