hey man. at least your doing it. i love the build. any progress is progress. no matter how small. something my uncle used to tell me. if you never start. youll never finish. i love the build and keep us updated
You are using an out of date browser. It may not display this or other websites correctly.
You should upgrade or use an alternative browser.
You should upgrade or use an alternative browser.
555/1000
- Thread starter mitsuturbo
- Start date
mitsuturbo
Well-known member
Haven't done much. Ordered water lines for the wastegate and some custom AN water line stuff for the turbo as well. Should have that done late next week, i suppose. Maybe i'll get the parts by this weekend though. That would be nice.
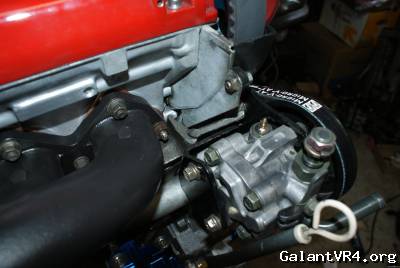
Here you can see how i cut the factory engine support bracket to better suit my needs
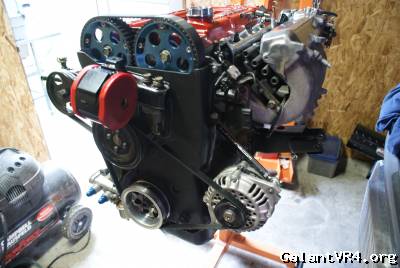
and here.. finally got the STEEL jayracing alternator relocation kit, mounted it, and got a belt to fit my setup
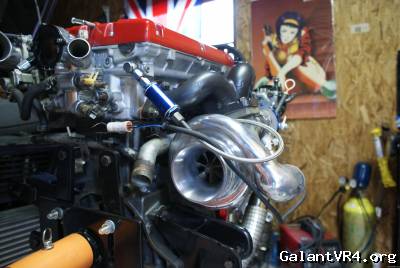
turbocharger is all cleaned up.. it's got some miles on it, so i hope it lasts a while... i need to start saving for my GT3082 CHRA now, i think
and one more just for good measure
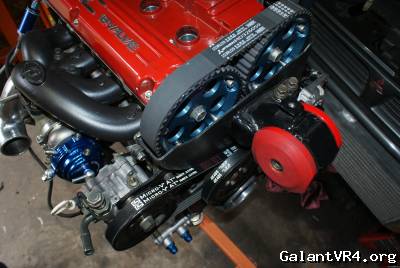
This one illustrates (quite well) the belts (with size visibly printed on them) which are needed to run a 7g PS pump as well as a Jayracing Alt relo kit with a UR Underdrive pulley.
I'm hoping to drop the engine before the end of the month. I'm just being VERY particular about things and money got tight around the holidays.
Here you can see how i cut the factory engine support bracket to better suit my needs
and here.. finally got the STEEL jayracing alternator relocation kit, mounted it, and got a belt to fit my setup
turbocharger is all cleaned up.. it's got some miles on it, so i hope it lasts a while... i need to start saving for my GT3082 CHRA now, i think
and one more just for good measure
This one illustrates (quite well) the belts (with size visibly printed on them) which are needed to run a 7g PS pump as well as a Jayracing Alt relo kit with a UR Underdrive pulley.
I'm hoping to drop the engine before the end of the month. I'm just being VERY particular about things and money got tight around the holidays.
Last edited:
mitsuturbo
Well-known member
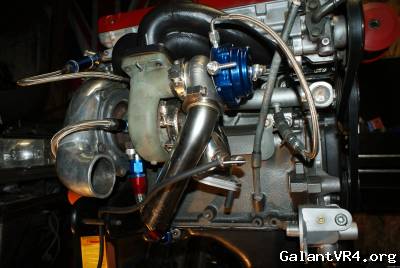
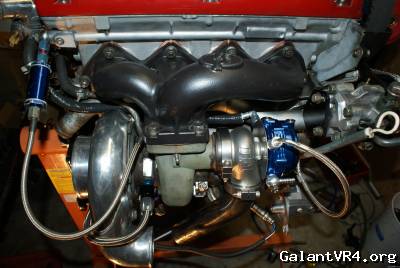
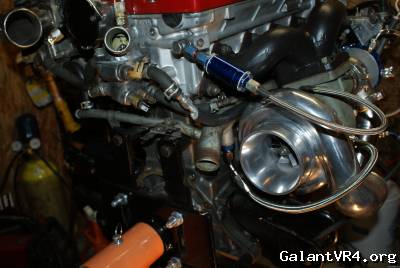
I got my water lines and fittings in recently, so i've been working on getting the wastegate and turbo fed.
You can see the one water line for the wastegate has a fire shield on it... i didn't want it getting too hot behind the manifold. The wastegate water lines are just PTFE -4AN with swaged ends, and a -4AN to 3/8 barb adapter on one end. I ended up running a factory water pipe after all.
The turbo water line that goes from the water pipe to the front isn't permanent. That's a PTFE line with regular screw on ends stuck on it for fitment/testing purposes. I didn't want to run regular rubber braided line to the turbo, because of how hot it gets. I bought this sh*t line from some company called Votion, and it's f***ing impossible to put it together as they explain it. It was supposed to go together as kind of a ferrule setup, but it does NOT work. (correction: i actually got it put together, but it turns out the fittings are crap, so i can't use this line anyhow) I've ordered a couple fittings and will build a -6AN line out of standard stainless braided line, with 45° reusable ends.
Water pipe adapter fitting is M14x1.5 to 6AN
Turbo adapter fitting is M12x1.5 to 6AN
Last edited:
mitsuturbo
Well-known member
bazeng
Well-known member
Very coool build mate....
Looking forward to see it in the car!
Looking forward to see it in the car!
mitsuturbo
Well-known member
It's in!
Unfortunately, i fucked up my back a bit today as well.. but the engine IS in, finally! I tapped a hole for my EGT, just past the turbo because i've seen too many probes break off and wind up killing a turbocharger. May end up having to weld a bung, but that will be easy when the time comes.
Someone recently said the prothane mounts are a real bitch to set the engine in on.... boy were they right! You "MUST" lube the mounts in order for them to go together right.
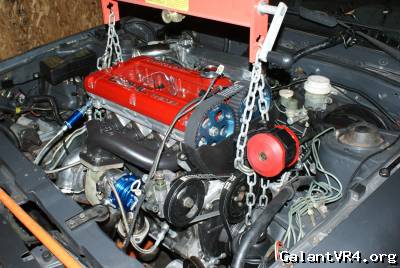
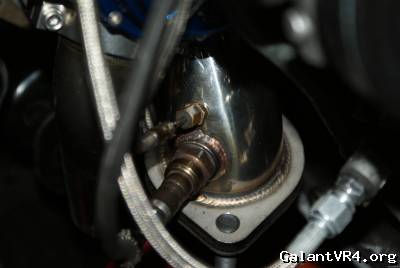
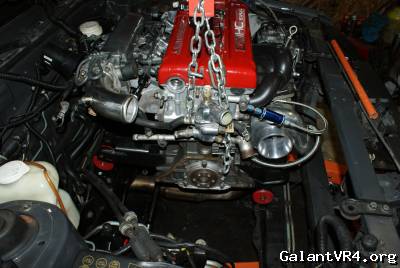
Finally, it's bolted in completely!
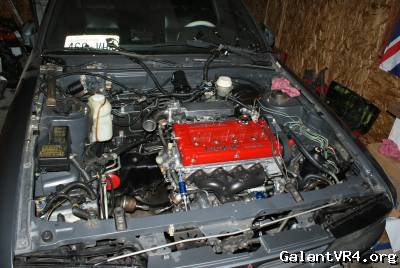
Looks like an alternator swap out wouldn't be so hard after all.
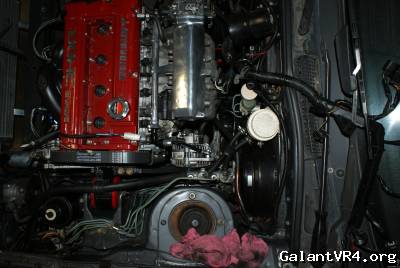
Now i've just got to figure out my intercooler plumbing, and a few more odds and ends.. should be good to go!
It should be on the road by next month. /ubbthreads/images/graemlins/grin.gif
Unfortunately, i fucked up my back a bit today as well.. but the engine IS in, finally! I tapped a hole for my EGT, just past the turbo because i've seen too many probes break off and wind up killing a turbocharger. May end up having to weld a bung, but that will be easy when the time comes.
Someone recently said the prothane mounts are a real bitch to set the engine in on.... boy were they right! You "MUST" lube the mounts in order for them to go together right.
Finally, it's bolted in completely!
Looks like an alternator swap out wouldn't be so hard after all.
Now i've just got to figure out my intercooler plumbing, and a few more odds and ends.. should be good to go!
It should be on the road by next month. /ubbthreads/images/graemlins/grin.gif
Terrance362
Well-known member
Looks good, glad to see things are coming together.
mitsuturbo
Well-known member
Made a little progress over the weekend. I Mounted the 4bar MAP sensor, the IAT, got the FPR mounted on the firewall (this took some bracket modification and i had to cut/assemble the fuel line). I got the Fuel filter to rail line put together, hooked up a bunch of electrical, and got the Scirocco radiator hooked up with what seems like a viable solution. I thought i was going to run the civic radiator, so i had bought silicone rad. hoses. I ended up using the lower for the upper, and modified the upper, and used it along with the "S" out of a factory nonturbo water pipe mid-span.
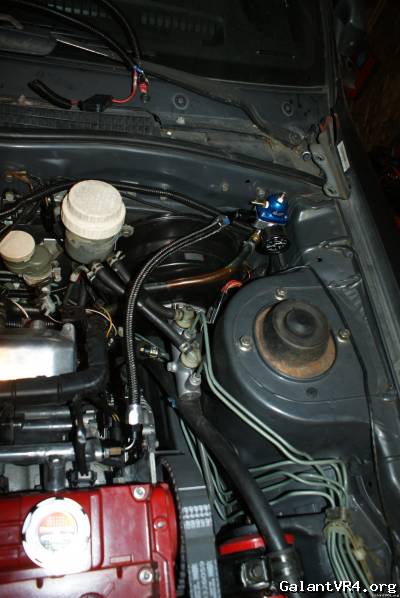
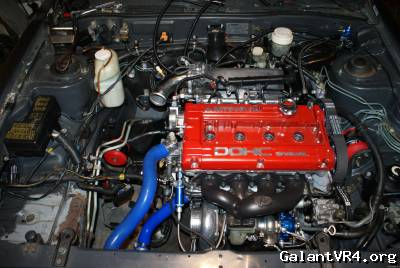
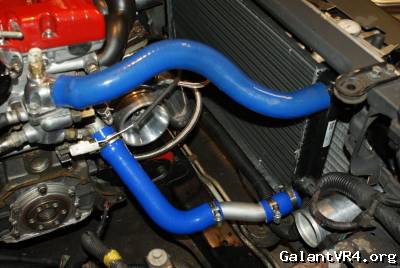
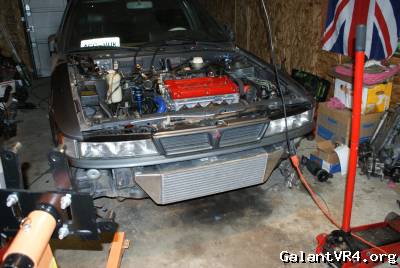
I still need to get the FMIC plumbing figured out, and mount an oil cooler.. as well as make a solid bracket for the radiator... then i can put the fascia back on so it looks presentable. Once i get a tranny put in, i'll toss the hood back on and get ready to fire it up!
I still need to get the FMIC plumbing figured out, and mount an oil cooler.. as well as make a solid bracket for the radiator... then i can put the fascia back on so it looks presentable. Once i get a tranny put in, i'll toss the hood back on and get ready to fire it up!
Whoodoo
Well-known member
Lookin better every update man. Why wait to fire it up until the tranny is in?
mitsuturbo
Well-known member
Precisely how do you propose i get the starter in place to turn the flywheel in order to start the engine? Hold it by hand?
Barnes
Well-known member
Quoting mitsuturbo:
Precisely how do you propose i get the starter in place to turn the flywheel in order to start the engine? Hold it by hand?
I've actually seen this done. I do not recommend it. I had a buddy that could not for the life of him track an engine leak coming from the back of his block. He had removed and installed his tranny like 3 times trying to figure it out. So finally he got fed up and decided he needed start the engine with the tranny out, and he did exactly as you describe. It was pretty scary. Good news is he figured out his leak.
mitsuturbo
Well-known member
Well, that's just crazy, Barnes. I'm not doing that sh*t without a lot of beer in me first, and i'm not starting this for the first time while being drunk! So it's not gonna happen.
I was looking for a better solution than i had for an intake pipe, and came across the STM 4" intake pipe. I won't link it, because IMO they don't deserve the extra attention, but let it suffice to say that i kinda copied what i saw on their site. I ordered two parts... an OBX (junk when under pressure, i know) 4" 45° silicone coupler, and a 4" 45° aluminum pipe... which i WILL polish. Still, I've to shorten it a bit on each end, and figure out the fitment more precisely, but this should work out quite well.
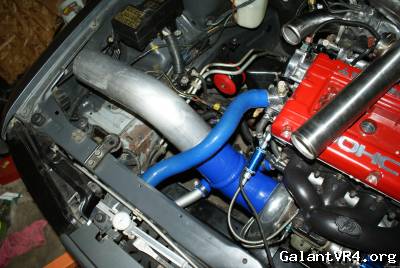
I was looking for a better solution than i had for an intake pipe, and came across the STM 4" intake pipe. I won't link it, because IMO they don't deserve the extra attention, but let it suffice to say that i kinda copied what i saw on their site. I ordered two parts... an OBX (junk when under pressure, i know) 4" 45° silicone coupler, and a 4" 45° aluminum pipe... which i WILL polish. Still, I've to shorten it a bit on each end, and figure out the fitment more precisely, but this should work out quite well.
mitsuturbo
Well-known member
Got the intake pipe cut to length, and a filter put on it. I still need to polish the intake pipe.
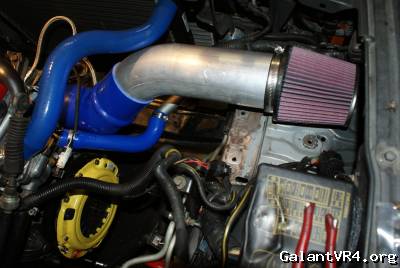
I got some other goodies this evening and put them on as well. Got new NGK wires, and a JMF plug cover. I also cut the Vibrant stainless 2'5" L pipe to length for my hotpipe. I still need to polish the hotpipe too. I would have gone with aluminum, but i couldnt find a 90 with a long enough leg to meet the turbo. Oh well, stainless seems to not transfer heat as much, so hopefully it'll be more impervious to turbine housing heat.
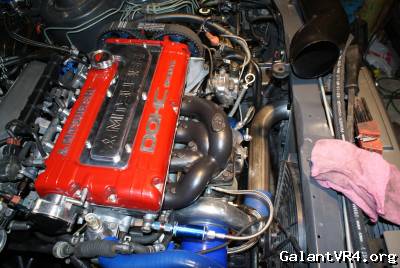
Still waiting on my 3' chunk of turbosmart 2.5" silicone, so i can cut some nice couplers. I also still need to figure out what i'm going to do for the cold pipe and a BOV. I haven't decided yet, but i think i want to keep running the SSQV. I really like it, and read all sorts of issues with Tial gates and springs. I've never had a problem with a SSQV. Ever.
Oh, and i still need to pick up a DSM water neck/filler cap. I'm also thinking of saving for a new tranny before i fire this thing up. We'll see how things look around the end of the month and everything else is done.
Couple other things i have to address are the fuel pump, and the catch can setup for the breather style oil cap. I've got a few hundred bucks to go before i'm ready to fire it up, and that's not considering a transmission, of course.
I got some other goodies this evening and put them on as well. Got new NGK wires, and a JMF plug cover. I also cut the Vibrant stainless 2'5" L pipe to length for my hotpipe. I still need to polish the hotpipe too. I would have gone with aluminum, but i couldnt find a 90 with a long enough leg to meet the turbo. Oh well, stainless seems to not transfer heat as much, so hopefully it'll be more impervious to turbine housing heat.
Still waiting on my 3' chunk of turbosmart 2.5" silicone, so i can cut some nice couplers. I also still need to figure out what i'm going to do for the cold pipe and a BOV. I haven't decided yet, but i think i want to keep running the SSQV. I really like it, and read all sorts of issues with Tial gates and springs. I've never had a problem with a SSQV. Ever.
Oh, and i still need to pick up a DSM water neck/filler cap. I'm also thinking of saving for a new tranny before i fire this thing up. We'll see how things look around the end of the month and everything else is done.
Couple other things i have to address are the fuel pump, and the catch can setup for the breather style oil cap. I've got a few hundred bucks to go before i'm ready to fire it up, and that's not considering a transmission, of course.
Last edited:
MellowVR4
Well-known member
/ubbthreads/images/graemlins/applause.gif very nice, did you use any of the piping included in the fmic kit?
mitsuturbo
Well-known member
Actually... no, i didn't. I'm going with all stainless. I just polished the hotpipe tonight, as well as the intake pipe, and i'm thinking i'm going to order a 45° stainless mandrel bend for the cold side. I have a mild steel 45, and one stainless 45 already. I mocked up a coldside setup this evening, so i know my layout.
I "could" have used the piping that came with it, but i didnt want to. It even fit ok, really. I'm just being SUPER picky, and dont want aluminum pipe because it oxidizes and starts looking cloudy, whereas stainless doesn't do this as badly. Stainless can be polished and stay that way better, as well. Another HUGE reason i didn't use the piping that came with the FMIC, is that i didnt want ANY silicone "bends". The only couplers i'll be using are either straight, or high quality hump hoses.
I'm going to replace the intake and hotpipe pics this coming weekend with the polished, finished product.
Last edited:
MellowVR4
Well-known member
it looks good.
Boostdtalon
Well-known member
Looks awesome. Its good to be super picky with this kind of work. Your less likely to cut corners that way.
mitsuturbo
Well-known member
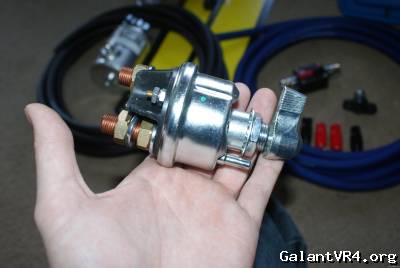
Got some more goodies today and yesterday. It's hard to believe this pile is $650 worth of sh*t. Between a $500 battery setup, and a $100+ catch can.. then all the little nickel and dime sh*t, summit racing decided i'd spent enough they love me and gave me a free hat!
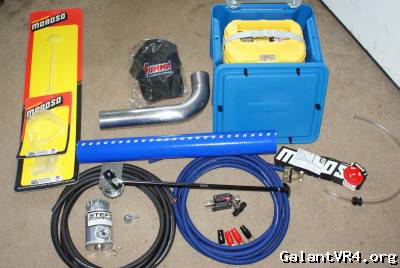
4 post battery switch. This thing is a beast, but it will get the job done!
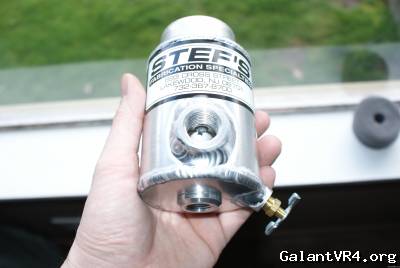
This is going to be my catch/breather can. This thing is awesome. I dont see there being ANY chance of oil entering my intake if i decide to run a hose from the bottom hole of this can to the intake pipe. If i want to run it as just a vented breather, that should be no problem too.
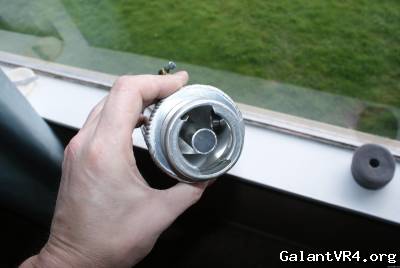
I took the foam out of it (pain in the ass to do, btw) so i could get some shots of the inside. This thing is far better than i expected it to be, with the baffling and such. I just have to figure how i'm going to mount it, now.
4 post battery switch. This thing is a beast, but it will get the job done!
This is going to be my catch/breather can. This thing is awesome. I dont see there being ANY chance of oil entering my intake if i decide to run a hose from the bottom hole of this can to the intake pipe. If i want to run it as just a vented breather, that should be no problem too.
I took the foam out of it (pain in the ass to do, btw) so i could get some shots of the inside. This thing is far better than i expected it to be, with the baffling and such. I just have to figure how i'm going to mount it, now.
Last edited:
mitsuturbo
Well-known member
Oh, the 250a circuit breaker is already broken. Merely trying to put it on a piece of wire and torque down the wire retaining bolt resulted in the entire case basically shattering. It sounded horrible, too. FLEabay part failed before even getting it on the car. DO NOT BUY THESE!
That was the one part i cheaped out on, and look what happened. $12 bucks down the shitter. I've since ordered a "stinger" circuit breaker which seems to be of similar, yet far better design, and accommodates 1/0 gauge wire as well. I'm hoping this $34 circuit breaker from a "name brand" company will be of much higher quality than this shipwreck freight type of sh*t.
I bought a 140a circuit breaker a while back, but it's the 2 "pole" type, with a nut, and the poles on it are just so small. I just saw it as being the "weak link" in the battery setup, so I decided it wasn't worth using with 1/0 gauge wire. Maybe i'll toss it in the monty once i put an amp and subs in the back.
The 17 foot ground wire i got is to be grounded along the body on the way to the engine bay, and then terminate at one of the starter/tranny bolts, most likely. I want a nice solid ground throughout the chassis, so as to eliminate any question about the charging system and ground supply from the battery.
Any further suggestions regarding the battery wiring are more than welcome.
turbowop
Well-known member
Why are you going to so much trouble with the ground? Run the ground from the battery to the rear shock tower and call it good. Just make sure you sand the paint down to bare metal at the connection point. I can do a continuity test from there to a ground location at the front of the car and don't see any significant loss. I just use 2awg wire for both ground and power. Never had an issue in 1051 or 503. And 503 sees some cold temps and nasty weather when skiing. Starts every time.
Last edited:


