bazeng
Well-known member
Hi Guys,
I just thought I'd share some installation instructions for this item.
The kit doesn't come with instructions and this is aimed to assist those who are unsure of the exact method.
click
I emailed them for instructions and no details were provided except for the recommendation to use loctite and to torque to spec.
The kit contains:
2x axles (pre assembled with big fat CV's)
2x adaptor plates (CV to 4 bolt flangge)
20x allen bolts
Installation:
There are 2 ways to potentially do this.
I won't mention the basics of getting the car off the ground.
Method 1.
1. Unbolt the 4x nuts /bolts from the 4 bolt cup (won't need these bolts so store them with the stock axle).
2. Remove the stock 4 bolt axles from the diff housing.
3. Unbolt the stock 4 bolt cup from the trailing arm (1x big nut). Use handbrake to stop from spinning.
4. Put cup into a vice.
5. Mount the DSS adapter plate to the stock 4 bolt cup.
6. Install 4x allen bolts and torque the bolts to spec (57 ft lbs with blue loctite)
7. Reinstall cup onto trailing arm
8. Torque 1x large nut to spec (refer to mitsu requirement)
9. Install new 4 bolt axle into diff housing and torque all 6x allen bolts to spec (57 ft lbs with loctite) from the diff side to adapter plate.
10. Repeat with other side.
Method 2.
1. Unbolt 4x nuts and bolts from 4 bolt cup.
2. Remove the stock 4 bolt axle from diff housing.
3. Pre-install the adaptor plate onto the DSS axle (6x bolts)
4. Torque all allen key bolts to spec (57 ft lbs with loctite blue)
5. Install the new DSS axle into diff housing
6. Align with existing 4bolt cup on trailing arm
7. Install bolts and torque by hand with allen key (difficult to get torque wrench in due to limited space)
8. Repeat on other side
I followed method 2.
Method 1 is probably a better way.
Pre installed 6x bolts
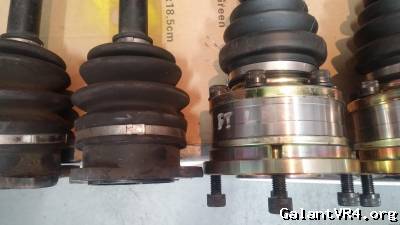
No dust covers in DSS axles
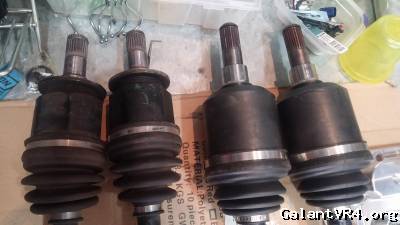
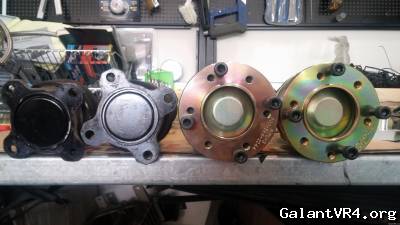
4 bolt stock (L) vs DSS 4 bolt 1000hp plates (R)
Stock
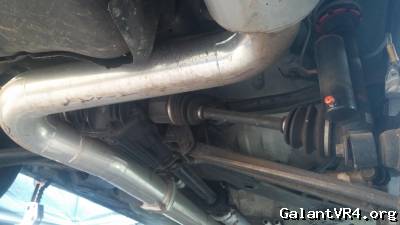
DSS installed
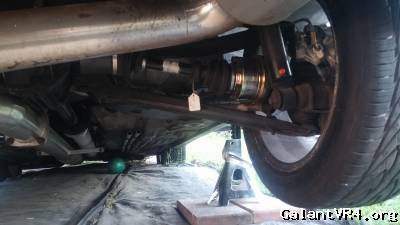
Not difficult but it did take some time.
I didn't have to drain the diff fluid either.
I also did it outside in a backyard so it shows how basic it is.
Note, I didn't have a fuel tank in the way as I'm currently undergoing a full fuel setup change (fuel cell in boot).
Hope this helps somebody in future.
Note, fronts look like a straight swap. I'll post some photos of the front once complete also.
I just thought I'd share some installation instructions for this item.
The kit doesn't come with instructions and this is aimed to assist those who are unsure of the exact method.
click
I emailed them for instructions and no details were provided except for the recommendation to use loctite and to torque to spec.
The kit contains:
2x axles (pre assembled with big fat CV's)
2x adaptor plates (CV to 4 bolt flangge)
20x allen bolts
Installation:
There are 2 ways to potentially do this.
I won't mention the basics of getting the car off the ground.
Method 1.
1. Unbolt the 4x nuts /bolts from the 4 bolt cup (won't need these bolts so store them with the stock axle).
2. Remove the stock 4 bolt axles from the diff housing.
3. Unbolt the stock 4 bolt cup from the trailing arm (1x big nut). Use handbrake to stop from spinning.
4. Put cup into a vice.
5. Mount the DSS adapter plate to the stock 4 bolt cup.
6. Install 4x allen bolts and torque the bolts to spec (57 ft lbs with blue loctite)
7. Reinstall cup onto trailing arm
8. Torque 1x large nut to spec (refer to mitsu requirement)
9. Install new 4 bolt axle into diff housing and torque all 6x allen bolts to spec (57 ft lbs with loctite) from the diff side to adapter plate.
10. Repeat with other side.
Method 2.
1. Unbolt 4x nuts and bolts from 4 bolt cup.
2. Remove the stock 4 bolt axle from diff housing.
3. Pre-install the adaptor plate onto the DSS axle (6x bolts)
4. Torque all allen key bolts to spec (57 ft lbs with loctite blue)
5. Install the new DSS axle into diff housing
6. Align with existing 4bolt cup on trailing arm
7. Install bolts and torque by hand with allen key (difficult to get torque wrench in due to limited space)
8. Repeat on other side
I followed method 2.
Method 1 is probably a better way.
Pre installed 6x bolts
No dust covers in DSS axles
4 bolt stock (L) vs DSS 4 bolt 1000hp plates (R)
Stock
DSS installed
Not difficult but it did take some time.
I didn't have to drain the diff fluid either.
I also did it outside in a backyard so it shows how basic it is.
Note, I didn't have a fuel tank in the way as I'm currently undergoing a full fuel setup change (fuel cell in boot).
Hope this helps somebody in future.
Note, fronts look like a straight swap. I'll post some photos of the front once complete also.
Last edited:


